This was my favorite dessert for the December 50's menu experiment. It is called a pudding, but isn't the creamy stuff that comes to mind when we say pudding now. It is a little bit of work, but makes a pretty and delicious product. It is a steamed pudding, and the only one in the book that doesn't call for suet.
From Meta Given's Modern Encyclopedia of Cooking, 1959 revision
Raisin Crumb Pudding
An old-time moist, tasty, inexpensive pudding
1 tbsp fine dry breadcrumbs
1 c seedless raisins, washed
3/4 cup fine dry breadcrumbs
1 cup buttermilk
1/3 cup all-purpose flour
1/2 tsp cinnamon
1 tsp soda
1/8 tsp cloves
1/4 c soft butter
1/2 cup moist brown sugar, pkd
2 tbsp light molasses
1 egg, beaten
Steam raisins in a colander over boiling water for 5 minutes to plump them. Grease a 4 to 5 cup mold well with soft butter, then dust with the 1 tbsp crumbs, shaking to distribute evenly. (I didn't have a mold and used a short squat handle-less pot from our backpacking stove.) Get steamer ready. (I didn't have a steamer, so I improvised by using my largest pot and using a small metal trivet from my pressure cooker in the bottom to raise up the pudding "mold" so it doesn't sit directly on the bottom of the pot. You will want to add enough water to come up 1/3 of the way on the sides of the mold and have a total water volume of 1 to 2 quarts.) About 10 min before needed, add the water to the steamer and place it over low heat.
Cool and dry off plumped raisins. Mix the buttermilk with the 3/4 c dry bread crumbs and set aside for 10 min to soften. Sift flour, measure and resift 3 times with the next 3 ingredients. (I don't own a sifter and skipped that process, just mixed them together.) Stir in raisins. Cream butter and sugar thoroughly; beat in molasses until smooth and fluffy. Beat in egg well; stir in crumb mixture and flour-raisin misture just until well blended. Pour batter into prepared mol;' it should be about 3/4 full. Cover mold with a square of greased, floured parchment paper, fastened securely with rubber band. (I also put a square of aluminum foil on top of that, also secured with a rubber band, as recommended in another portion of the book on steaming puddings.)
Place mold in steamer, cover and steam vigorously for 1 hr; reduce heat and steam at a moderate rate for 2 hrs longer. (Add more water if needed) Lift out onto cake rack; remove lid or cover, and immediately invert pudding on cake rack covered with parchment paper. Parchment covers may be re-used in this way. Carefully lift off molds. Serve warm; or cool thoroughly, wrap in waxed paper, and store in refrigerator until ready to serve. Then reheat by steaming. Serve warm with hard sauce. (Steamed puddings should be served warm. Don't leave standing in steamer at the end of cooking to keep warm.) Makes 6 to 8 servings
For the hard sauce, I used one that did not have any alcohol in it. Although I believe that it is probably more customary to use one with. I found one at allrecipes.com that seemed to have a heritage dating back to the appropriate time frame. Hard Sauce for Cake

Showing posts with label History. Show all posts
Showing posts with label History. Show all posts
Tuesday, December 20, 2011
Monday, December 19, 2011
A 50's Weekday Menu
Another menu based on my cooking 50's style experiment. This one is meant for a weekday. No luncheon is included, because we don't have lunch together as a family, unlike what seemed to happen more frequently back then.
Breakfast
Freshly sliced oranges
Poached eggs on toast
Bacon
Milk
Dinner
Sausages
Pan fried onions
Mashed potatoes
Shredded lettuce with Mayonaise
Bread and butter
Apple Cobbler
Breakfast
Freshly sliced oranges
Poached eggs on toast
Bacon
Milk
Dinner
Sausages
Pan fried onions
Mashed potatoes
Shredded lettuce with Mayonaise
Bread and butter
Apple Cobbler
Sunday, December 18, 2011
A 50's Sunday Menu
I thought it would be fun to post a Sunday menu, based on the menu's I cooked for my 50's cooking experiment. It contains some of our favorite things I cooked.
Breakfast
Grapefruit halves
Griddle Cakes
Sausage
Syrup
Milk
Dinner
Roast Chicken
Dressing
Mashed potatoes and gravy
Corn
Whole Wheat Bread and Butter
Milk
Raisin Crumb Pudding with Hard Sauce
Supper
Egg Salad Sandwhiches
Dill Pickles
Pears
Cocoa
Breakfast
Grapefruit halves
Griddle Cakes
Sausage
Syrup
Milk
Dinner
Roast Chicken
Dressing
Mashed potatoes and gravy
Corn
Whole Wheat Bread and Butter
Milk
Raisin Crumb Pudding with Hard Sauce
Supper
Egg Salad Sandwhiches
Dill Pickles
Pears
Cocoa
Results of the 50's Cooking Experiment
My 50's cooking experiment has lasted longer than the original week I had intended. Either this menu is really idealized or the 50's housewife spent a lot of time in the kitchen. Cooking 50's style just doesn't mesh well with our busy lifestyle. So, the 50's meals have been spread out and intermixed with quicker, busy day meals. My family in general has loved 50's style cooking, especially breakfasts. Things I have learned about cooking 50's style:
1. They ate a lot more eggs and bacon and sausage. Bacon and sausage are served at 6 meals during the week, 5 breakfasts and one lunch. We kept the serving sizes to 1 or 2 slices each, to limit fat. Interestingly, when I've had 50's breakfast, even if I don't eat any more volume, I stay full until lunchtime.
2. There are a lot more "sides." Even for breakfast. So, instead of cereal and juice, one would serve cereal, toast, bacon and a dried fruit compote/grapefruit half/sliced oranges. Both my husband and I remember visiting grandma's and having them serve more complicated breakfasts like this. I always thought it was cooking for guests, but perhaps it was an everyday thing. My family loved eating breakfast this way every day.
3. Desserts were different. Most were made with very simple ingredients. It's amazing the variety of results you can get from using things like eggs, flour, butter, and cream. Fruits were frequently used. And desserts were served every night. Most of the deserts were surprisingly good. I had to learn several new cooking techniques: using a double boiler, steaming a pudding, baking a custard, poaching merengue.
4. Meals were pretty. Not every single meal, but most had a variety of color and texture. The number of sides made this easier to accomplish. But, overall a 50's meal was pleasing visually as well as in taste.
5. They used a lot of dried fruit. There is quite a range of fresh fruits and vegetables for a December menu, so they had pretty good access to a variety of produce. Some were not ones that we typically use and see at our grocery store, like brussel sprouts and rutabagas. But, dried fruit was still heavily used. I wondered if this was a carryover from times when produce was less available and dried foods would be needed in the winter months.
Sunday, December 4, 2011
Eating 50's Style

So, I'm onto my latest kooky experiment. I was recently reading a cookbook from the 50's: Meta Given's Modern Encyclopedia of Cooking. I love reading domestic books from that era. The way they phrase things and the insight into the homemaker mind at the time just fascinate and amuse me.
Anyways, I came across the menu planning section. In it they gave a week's worth of sample menus for each month of the year: "Using seasonal foods in thrifty balanced menus." Planning menus every week gets to be a drag sometimes, so I thought it might be fun to give these a try. It seemed like a fun way to get a glimpse of what cooking and eating at home was like in the 50's, in an immersive experience. Granted, the menu is probably an idealized one.
Some of the foods to be eaten daily:
quart of milk for children, pint for adults
meat, poultry, fish or cheese; liver or variety meat weekly
1 egg, if possible
a yellow or green veggie
white or sweet potatoes
1 other veggie
a serving of citrus or tomato
another fruit
You'll notice that there are 5 fruits and veggies. Qualifying for the "5 a day" campaign we hear about now. The menus also serve a dessert with every dinner and almost every lunch.
The guidelines for feeding young children differ from what we do today. Before the age of 5 or 6, the child should be served foods that are bland. Cereal should only be slightly sweetened. No pepper or spices, except a tiny amount on special occasions. No rich gravies or pastry. His heaviest meal should be mid-day, with his evening meal a milk soup, cereal and milk or bread and milk as its basis. And for convenience, the child may be fed early and sent to bed before the rest of the family is served. Needless to say, we aren't subjecting Cyrus to these guidelines.
The book emphasizes that because we no longer have the large appetites that our agrarian forefathers had, that we eat less food, and hence need to carefully select that food to make sure we cover all of our nutritional requirements. The meals tend to have a great more dishes served than I usually do. And yet, by strictly following the recipes according to serving sizes, I think they must have had much smaller serving sizes than we think of today.
The lunch menus are much more elaborate than I would ever do with just Cyrus and I at home, so I haven't been following them. We speculated that perhaps the rest of the family was more likely to come home and eat lunch at that time than happens now. A couple times I have replaced the dinner menu with the lunch menu, when the suggested dinner menu is likely to cause mutiny. Another interesting tidbit: on Sunday, lunch is called dinner and is the big meal of the day, and dinner is called supper.
Finally, The Meal Planner's Creed:
The health of my family is in my care; therefore--
I will spare no effort in planning meals containing the right kinds of foods in the right amounts.
Spending the food dollar to get the most for it is my job; therefore--
I will choose foods from a wide variety, variously priced to save money without sacrificing health.
My family's enjoyment of food is my responsibility; therefore--
I will increase their pleasure by preparing a variety of dishes attractive in color and form and pleasing in flavor and texture.
My family's health, security, and pleasure depend on my skill in planning meals; therefore--
I will treat my job with the respect due it.
Italics as written. This was serious business! As this was an era of modern labor saving advances, caring for the family and serving them food was much easier than it had ever been. What does a woman do with all that extra time? Why, raise standards and use it to do what she does even better! I'm speculating that is what happened. And that perfect housewife paradigm then led to the feminist revolt, perhaps? Anyone know of a good history book on this subject?
Wednesday, June 15, 2011
My Pioneer Clothing
I get to go on the pioneer trek this year! I have wanted to go on one of these since I first heard about them for many reasons. Just one of them is the excuse it gave me to sew myself a historically accurate pioneer outfit. Now, trek's are more of a spiritual experience than a strict historical recreation, so this amount of accuracy isn't necessary. But, it was something I loved learning about and doing. For a time I wanted to be a costumer. So, this fulfilled a little of that whim, as well. So, here it is, my Mid 19th century clothing:

The pictures are kinda small, but if you click on them you can see them larger. First the "underpinnings". A chemise, kind of like a slip, and corset. The trek time period is late 1850's, so corsets with front opening metal busks were in use, but the "tight cinching for waist reduction" we all think of when we hear corset wasn't a part of it. It was just their version of a bra.

I drafted my own pattern for the corset using duct tape. I enlisted dh to wrap me up in it over a T-shirt. Not one of our usual activities, I assure you! Notice the two extra grommets. Those are not supposed to be there. Oops! This thing would have also had metal boning. Mine only has bones along the back opening edges. The rest is stiffened with rows of "cording", tight rows of crochet cotton stitched in narrow channels.

Next come the split drawers. The drawers were actually optional. And despite the being split, are pretty covering.

The chemise can be tucked in as shown, or the drawers can be worn under the chemise and corset. When worn underneath, the split feature becomes very helpful, I hear. When worn tucked in, you get some nice boofy butt.

Next are the petticoats.
 We are close to the time of the hoop skirt, but for travel, especially with a handcart, you would not wear a hoop. What was worn before the hoop were multiple starched and stiffened petticoats. Sometimes with flounces (multiple tiers) or tucks (stitched and folded over horizontal pleats) or with cording.

I went the cording route with 35 rows spaced in sets of 3 to 5. The cording also has the advantage of preventing your skirts from getting caught up between your legs as you walk.

Topped with another, plain, petticoat. I starched the petticoats, bonnet and aprons by submerging them in a mixture of Stayflo liquid starch and water, then ironing them while damp. Took forever! I can't imagine doing that on a regular basis with a cast iron iron I have to heat on a stove or fire. The starch will protect them from staining and made them nice and crisp/stiff. I now fully understand the phrase "rustling petticoats." They literally make noise when moved!

Then the dress. This is what modern re-enactors would call a work dress. Coming up to the base of the neck, closed with hooks and eyes, with full bishop sleeves that can be rolled up, if needed. A wool or silk dress would have darts, but a cotton dress is pleated or gathered, this is the latter. The fabric is a civil war reproduction print. I drafted the patterns for the bodice and sleeves myself. The dress has piping (my first ever) at the neckline, waist and armscye (shoulder seam). Notice the armscye is dropped off the shoulder. This made the shoulders appear wider, creating an illusion of a smaller waist. The skirt is on the short side, in order for ease in "trekking". I did add a tuck to it that would allow me to drop it up to 4 inches later, if I choose. The skirt is made of four full width panels of fabric. In order to get that much fabric gathered into a fitted waistband, a technique called gauging is used. Two hand stitched rows of stitches are used to tightly pleat the fabric into accordian folds. One edge of those folds are then whip stitched to the bodice, just behind the piped edge bottom, so that the skirt actually hinges off and out on the bottom of the bodice. This looks very tidy and adds boof factor to the skirt.

Then the accessories: A fringed wool shawl, apron, long stockings, a neckerchief to protect the neckline from soiling, boots and a bonnet. The boots are not quite right. They should be leather with square toes, but that wasn't in my budget.

The bonnet is corded, as well, to stiffen the brim. Some bonnets would have stiffened the brim using strips of cardboard, called a "slat" bonnet. Since I'm likely to encounter rain, I decided to go the corded route. The back is long enough to provide sun protection and shade to the neck and shoulders.

So, there it is. Pioneer clothing ready to go. Hiking in this full outfit is probably going to be miserably hot. So, I'm not likely to go with the full set of layers, at least most of the time. Curiously enough, I was reading a woman's account of her experience in the Martin Handcart company yesterday. By the end of the trek, her son's pants were in rags and their feet freezing. She then used all of her underpinnings to protect their legs, so when she finally made it to Salt Lake City, she was ONLY wearing two skirts. So, I'm thinking she went almost the whole way with a full set of layers.
Credits:
I would like to thank Elizabeth Stewart Clark's The Sewing Academy website, forum and compendium. Also her book, Practical Pinkery. All of which were greatly helpful in my mid-century clothing education and without which the success of this adventure would have been impossible. In addition to Practical Prinkery, I used the following to help me, most of which are links to Instruction Sheets created by Elizabeth Stewart Clark:
How to Sew a Chemise
How to Sew Split Drawers
How to Sew Petticoats
How to Sew an 1857 Sunbonnet
How to Sew a Slat Bonnet
(I adapted the information from the above two for my bonnet.)
How to Make an Apron
How to Make a Fringed Shawl
How to do Pioneer Hair
The pictures are kinda small, but if you click on them you can see them larger. First the "underpinnings". A chemise, kind of like a slip, and corset. The trek time period is late 1850's, so corsets with front opening metal busks were in use, but the "tight cinching for waist reduction" we all think of when we hear corset wasn't a part of it. It was just their version of a bra.

I drafted my own pattern for the corset using duct tape. I enlisted dh to wrap me up in it over a T-shirt. Not one of our usual activities, I assure you! Notice the two extra grommets. Those are not supposed to be there. Oops! This thing would have also had metal boning. Mine only has bones along the back opening edges. The rest is stiffened with rows of "cording", tight rows of crochet cotton stitched in narrow channels.

Next come the split drawers. The drawers were actually optional. And despite the being split, are pretty covering.

The chemise can be tucked in as shown, or the drawers can be worn under the chemise and corset. When worn underneath, the split feature becomes very helpful, I hear. When worn tucked in, you get some nice boofy butt.

Next are the petticoats.


I went the cording route with 35 rows spaced in sets of 3 to 5. The cording also has the advantage of preventing your skirts from getting caught up between your legs as you walk.

Topped with another, plain, petticoat. I starched the petticoats, bonnet and aprons by submerging them in a mixture of Stayflo liquid starch and water, then ironing them while damp. Took forever! I can't imagine doing that on a regular basis with a cast iron iron I have to heat on a stove or fire. The starch will protect them from staining and made them nice and crisp/stiff. I now fully understand the phrase "rustling petticoats." They literally make noise when moved!
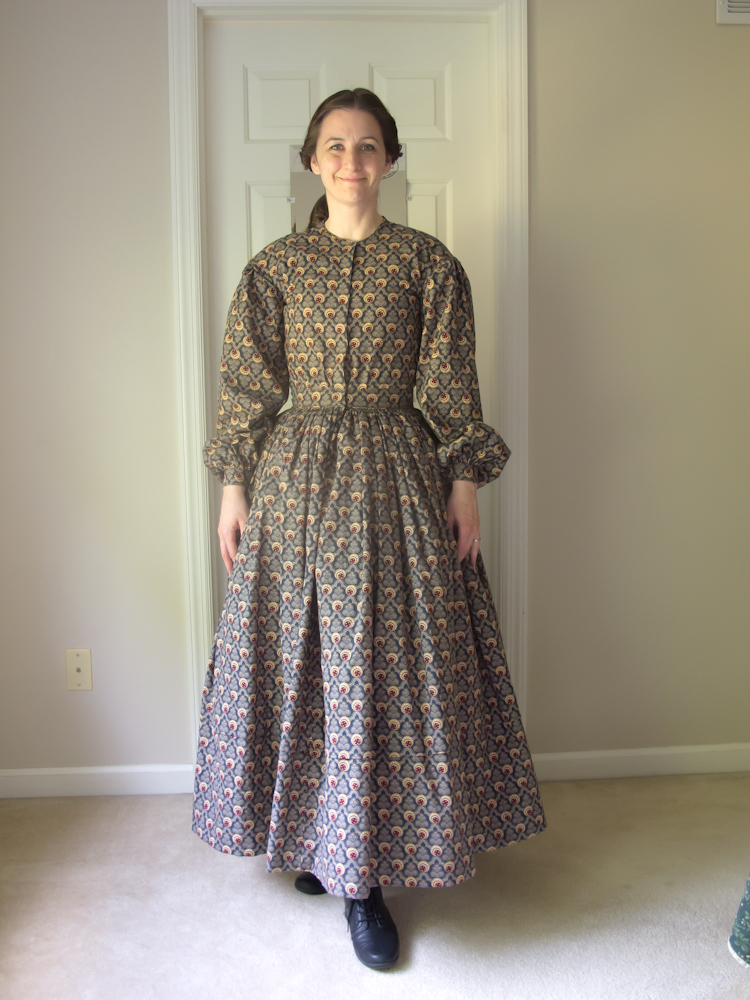
Then the dress. This is what modern re-enactors would call a work dress. Coming up to the base of the neck, closed with hooks and eyes, with full bishop sleeves that can be rolled up, if needed. A wool or silk dress would have darts, but a cotton dress is pleated or gathered, this is the latter. The fabric is a civil war reproduction print. I drafted the patterns for the bodice and sleeves myself. The dress has piping (my first ever) at the neckline, waist and armscye (shoulder seam). Notice the armscye is dropped off the shoulder. This made the shoulders appear wider, creating an illusion of a smaller waist. The skirt is on the short side, in order for ease in "trekking". I did add a tuck to it that would allow me to drop it up to 4 inches later, if I choose. The skirt is made of four full width panels of fabric. In order to get that much fabric gathered into a fitted waistband, a technique called gauging is used. Two hand stitched rows of stitches are used to tightly pleat the fabric into accordian folds. One edge of those folds are then whip stitched to the bodice, just behind the piped edge bottom, so that the skirt actually hinges off and out on the bottom of the bodice. This looks very tidy and adds boof factor to the skirt.

Then the accessories: A fringed wool shawl, apron, long stockings, a neckerchief to protect the neckline from soiling, boots and a bonnet. The boots are not quite right. They should be leather with square toes, but that wasn't in my budget.

The bonnet is corded, as well, to stiffen the brim. Some bonnets would have stiffened the brim using strips of cardboard, called a "slat" bonnet. Since I'm likely to encounter rain, I decided to go the corded route. The back is long enough to provide sun protection and shade to the neck and shoulders.

So, there it is. Pioneer clothing ready to go. Hiking in this full outfit is probably going to be miserably hot. So, I'm not likely to go with the full set of layers, at least most of the time. Curiously enough, I was reading a woman's account of her experience in the Martin Handcart company yesterday. By the end of the trek, her son's pants were in rags and their feet freezing. She then used all of her underpinnings to protect their legs, so when she finally made it to Salt Lake City, she was ONLY wearing two skirts. So, I'm thinking she went almost the whole way with a full set of layers.
Credits:
I would like to thank Elizabeth Stewart Clark's The Sewing Academy website, forum and compendium. Also her book, Practical Pinkery. All of which were greatly helpful in my mid-century clothing education and without which the success of this adventure would have been impossible. In addition to Practical Prinkery, I used the following to help me, most of which are links to Instruction Sheets created by Elizabeth Stewart Clark:
How to Sew a Chemise
How to Sew Split Drawers
How to Sew Petticoats
How to Sew an 1857 Sunbonnet
How to Sew a Slat Bonnet
(I adapted the information from the above two for my bonnet.)
How to Make an Apron
How to Make a Fringed Shawl
How to do Pioneer Hair
Thursday, July 24, 2008
Second Annual Pioneer Days


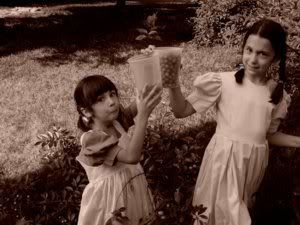
The girls enjoyed our Pioneer Days last summer so much that we decided to do them again this year. This time we did it on Pioneer Day, July 24th, and invited a couple of friends over to do it with us. The boys weren't gone on the trek this year and didn't really want to participate, so we limited it to 2 days and only 1 night. We did many of the same things we did last year, but also did some things new, like making corn husk dolls and playing traditional yard games. I did make sure that we spent some time reading some family histories of our pioneer ancestors to them. By candlelight, of course! It was very tiring and I'm thinking every other year might be easier and maintain the specialness of the whole thing.
Relief from the serious photos...

Making butter...

The bathroom facilities...

One of the best things was the food. The pie and bread were tasty, but none of us were to impressed with fried green tomatoes. And, yes, those are Little House on The Prairie Books for reference!

Corn husk dolls. I used to make these when I was a kid. Its funny how you don't forget how to do things sometimes, even when it is decades later before your try again.


An old fashioned sing around the piano.

Friday, June 27, 2008
Sandwich Glass Museum
Sandwich is one of the prettiest towns on the Cape and I've always wanted to visit the glass museum there. At one time Sandwich was the site of one of the most well known glass making manufacturers in the world. Innovators in the industry, they created the method of glass making called pressed glass. This method suddenly made glass making much more efficient and affordable. The Glass works is no longer in operation, but a museum is there to share its history and show off its beautiful glass creations. At the museum we were able to see a glass making demonstration. The girls got to help operate the press and were rewarded at the end with their own hand made glass swan each.

They had a temporary exhibit there of glass paperweight art. It was very beautiful.


We also witnessed the opening of a new exhibit that demonstrated a table set in colonial times with all the glassware laid out, complete with a talking "hologram" to explain it all.

It was created to help visualize how all of the special glass items we no longer use would have been used on a traditional table. Items like celery jars and salts. A light inside would light up each one as it was talked about. In addition, the creator of the exhibit was still there tweaking it and willingly answered our questions about how it was all done and showed us the control panel. He even told us that the cat that breathes on a chair in the corner was a purchase off of eBay.

After the museum we headed over to the pond and saw some geese. There were supposed to be swans, too. But, we didn't see any of them. The kids still thought the geese were fun.

Notice the girls keeping their feet up. The ground was quite goose poopy!

Tuesday, June 24, 2008
Cemeteries and Sailing Ladies

Over the weekend we got back from our vacation to Cape Cod. It was a fun trip and we did a lot of fun things, some traditional favorites, and some new adventures.
Cyrus is an early riser, often awakening at 5:30 am. So, to let the rest of the family sleep, I started taking him on morning walks, often with one or more of the girls along. We walked along the beach, of course, but also through one of my favorite places, the Brewster Cemetery. It is a huge cemetery full of mostly very old headstones, many of which belong to sailing captains and their families. I love to walk through them and read the names, dates and verses and imagine what they were like.
Last year, Grandpa Tony let me read his copy of "Sail Away Ladies" by Jim Coogan, a book about women who sailed during the great age of sail. It is a fun and fascinating read. A couple of the ladies in the book are laid to rest in the Brewster Cemetery and I was able to find their headstones. One was named Bethia Knowles Mayo Sears.

The daughter of a farmer, at the age of 19, Bethia married Elisha Freeman Sears of Brewster, MA, newly captain of the clipper "Wild Ranger". They set out a month later from Boston for her first sea voyage on a journey to San Francisco and India. The trip held the usual hardships common on sailing vessels at that time: sea sickness, toothaches, sunburn, storms, oppressive heat, frigid cold, hail, water rationing, doldrums (lack of wind)and a sailor going overboard. (He was saved, luckily, as most sailors could not swim.) In spite of the hardships they were a happily married couple and enjoyed pieces of their wedding cake at holiday celebrations, visiting exotic China and India and teaching each other. He taught her to navigate, and she taught him to knit and embroider. She made him molasses candy.
Unfortunately, she became ill as they neared India, and her weakened condition caused her to fall prey to a tropical illness while visiting there, possibly cholera. After languishing for nearly 2 months, she passed away in her husbands arms, just 20 days past their first anniversary. His words are so sad:
"My poor wifey is dead and gone. She laid her head on my shoulder like a child going to sleep and died. Oh, yes, she died. I would not have believed it, no not when they took her away from me cold and stiff in death. Oh, if a mother could have been with her to close her eyes, or a sister to have wept with me- What a comfort it would have been- but no, I was all alone...Oh why did she die- why has she been taken from me-Oh God have mercy."

He transported her body back to Brewster for burial, and he now lays to rest between her and his eventual second wife, with whom he would have 3 children, one of whom would die in infancy.
And we look for and visit her grave.
The idea of sailing on those ships is a romantic one and I've often thought it would have been fun to experience it. But, in reality it was a hard life and I probably wouldn't have liked living it as much as I like reading about it.
(P.S. I now have my own autographed copy of "Sail Away Ladies". Thank you, Tony!)
Wednesday, June 13, 2007
O Pioneers...
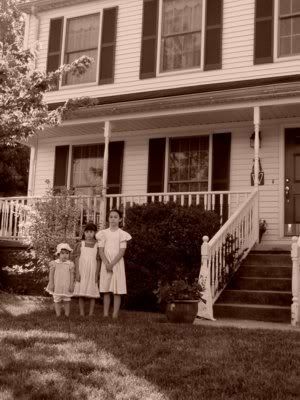
My husband and son left on Monday to participate in a pioneer trek, a recreation of the experience of handcart pioneers. Here is my husband, dressed and ready to go. (Marvin left early and I missed getting a picture of him.)

Isn't he handsome? The girls and I were jealous and decided we would have our own pioneer experience while they were gone. Did you ever see those PBS historical reality shows, such as Frontier House and 1900 House? We tried to recreate our own version. I'll let the girls journal entries tell the story:
Emily:
June 12, 2007
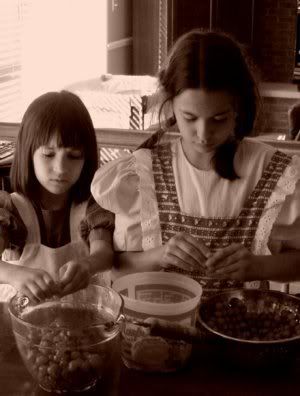
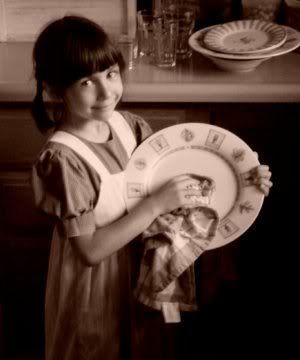
To be a pioneer is fun, but hard! First, we built a loaf of homemade bread. Then we got 3 and a half bucketfulls of cherries. It was fun! When I was a pioneer girl I felt that I hardly had any free time. I would bring in water from the well. Then I would wash in the basin. Then I would watch Cyrus while Mom built dinner. What I liked best about being a pioneer is when we picked cherries for a homemade pie. Yumm! What I did not like about being a pioneer is doing all that work! Not very much play time, and always work, work, work! What I learned is pioneer life is hard. I want to do it again!
PS. We also made butter!
Maddy:
June 12, 2007
We picked cherries and made a pie. We fetched water from the well. We waltzed. We lit candles. We swam in the pond. I crocheted. It was fun. We ate pancakes, eggs and sausage. We built butter and bread and biscuits. We weeded, pitted cherries, broke beans and picked peas. I hope to do this again!
Mom:
We also read histories of our pioneer ancestors, bathed in a big wash tub in the kitchen with water we heated on the stove and did rag curls. Well, I didn't bathe in the wash tub or have rag curls, but the girls did. I did do some laundry in my big black enamel pot and rinsed it out in the pond (wading pool). In the dark. So my neighbors wouldn't think I was nuts! And for the record, we cheated. We chose to stick with modern diapering and toileting. Because I really am not crazy.
I learned:
I would not have made for an attractive pioneer. The "no make up, hair parted down the middle and worn tightly in a bun, hairy leg" look does not become me.
Their lives were focused on feeding their families. The vast majority of my time was spend gardening, picking produce, cooking and cleaning up after meals. As long as there had been enough food, I would have liked this part of pioneer life. I really enjoyed the cooking, baking and gardening.
Their lives were simpler, but much more exhausting.
They spent a lot more time interacting with each other.
After spending two days thinking about what kind of lives my ancestors lived, I started to consider what they would think about the way we live today. I decided they would have been in wonder about many things such as refridgerators, freezers, cars and phones. But, they would have considered much of what we fill our lives with as excessive and unnecessary. And our use of resources as wasteful.
It was a good learning experience and a fun way to kick off our summer!
Friday, December 15, 2006
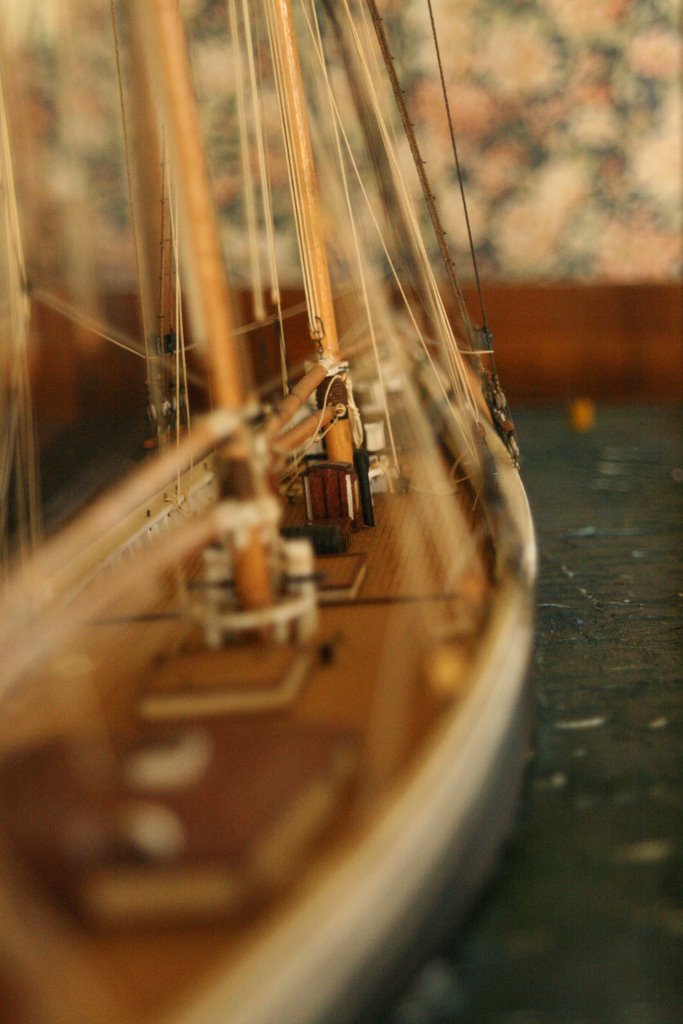
Tony's Ship Models

(Click on any of these photos to see them enlarged)
I like to share things I think that are really neat on my blog, especially if they have anything to do with family. My father in law, Grandpa Tony, has an amazing hobby. He builds historically accurate, scale ship models. From scratch. Yes, he does start with a kit, but since the kit is basically a set of plans and a very roughly shaped wooden hull, I still consider that from scratch.
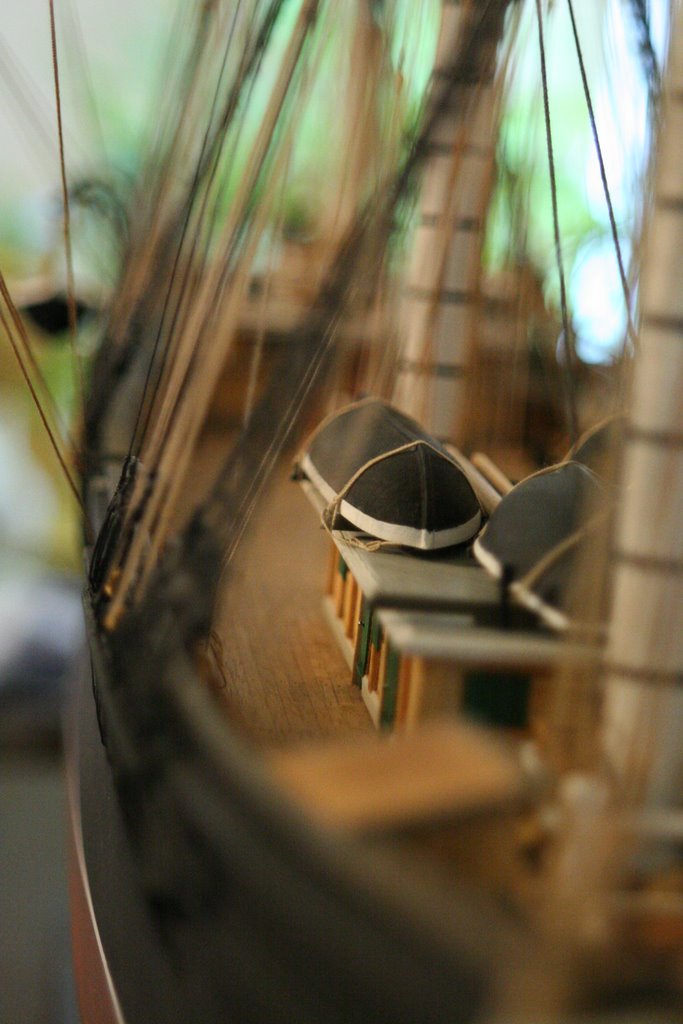
Having spent his summers on the beach of Cape Cod, and being an experienced sailor himself, he loves all things ship and boat. I like to think that, as he builds them, he enjoys imagining what it would have been like to be one of the men that once sailed on them.
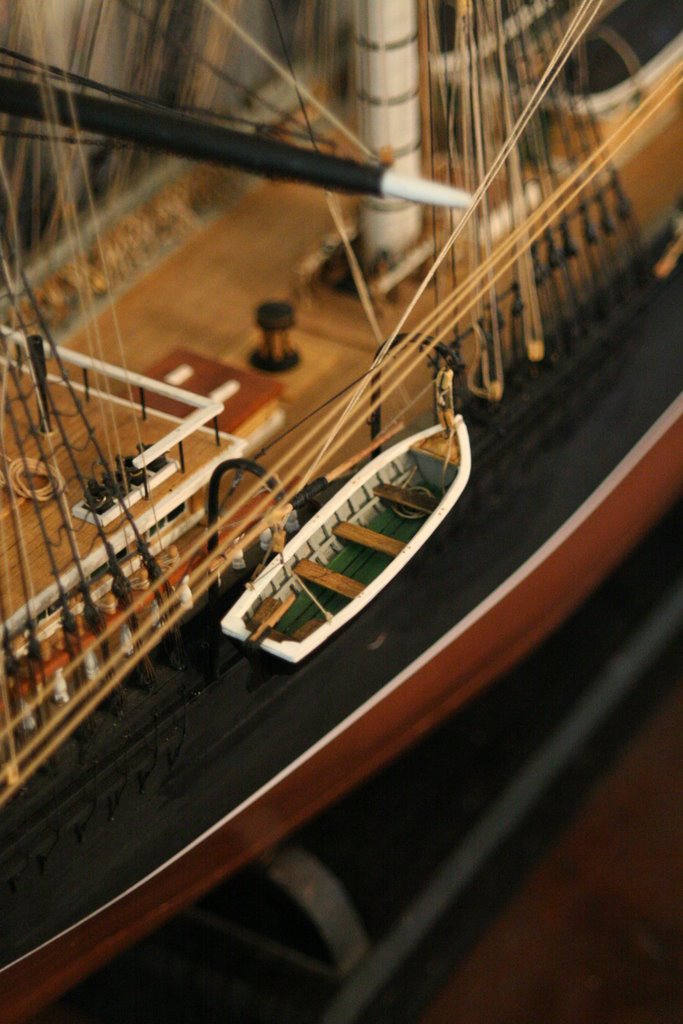
The detail work he does is amazing. The little rescue boat here that hangs off the side of the ship is only a little bigger than my finger. (Can you find it in the very top photo? It gives some idea of the size of this model.) All the rigging is carefully done by hand, with tiny mini pulleys. The mesh ladder ropes are not purchased mesh, but are carefully made completely by hand, one knot at a time. Obviously, these boats are a labor of love and take enormous amounts of time to complete. And each one he makes seems even more amazing than the last. Here is just one of his previous models:

I was surprised to learn that there are many people out there with this same hobby. In fact, Tony belongs to a group,
The Ship Model Society of Northern New Jersey, that regularly gets together to share tips and show off their work.
I'm going to do a separate blog about his latest boat, one that has been featured in the society's newsletter,The Broadaxe, and is named after my mother in law, Sally. It's a fun one!
Sunday, August 27, 2006
Remembering 9/11 Victims

Today I ran across a special blogging opportunity. Someone came up with the great idea of a blogging tribute to the victims of 9/11. On the upcoming anniversary of that tragedy, 2,996 bloggers will post individual tributes, each honoring one of the victims of the terrible events of that day. What a great opportunity to be a part of something really noble and important. I was very excited about it, and almost signed up, but as I read about some of the few as yet assigned victims, I started to feel very emotional and knew that in my weepy pregnant state that this would be too hard for me to do. Maybe if they do it again next year. But, I do look forward to seeing many of the tributes. The idea is that so many tributes will be out there on that day, that everyone who reads blogs will encounter them and remember. Maybe you would like to participate? You can sign up here. Last I checked there were 83 unassigned victims. September 11th is coming up fast and it would be very sad if there were any that did not get assigned in time.
Friday, July 7, 2006
Salem, MA
We did a day trip on our vacation up to Salem, MA. We've gone there before, in October, when the crowds were thick and full of unusually dressed people, making you think they are on their way to Diagon Alley. It seems Salem is a bit of a witch mecca, which is really ironic considering how fervently the residents in 1692 sought to eradicate any presence of witchcraft out of their town.
It seems some young girls started accusing women of practicing witchcraft, snowballing a flurry of accusations and trials. Hundreds of people were investigated, 19 were sent to the gallows, and one man was pressed to death for failing to make a plea. It didn't end until the girls went too far and accused the govenor's wife. There is a memorial next to the cemetary with each of the names of the sentenced. Some of their statements are engraved in stone and are really sad, "I am wholly innocent of this wickedness", "I will speak the truth as long as I live", "God knows I am innocent." Very sad. Moving on now...
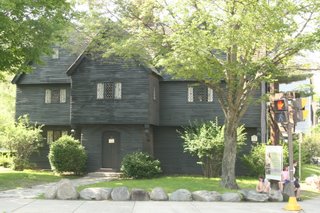
I really liked visiting Salem when it wasn't so crowded, mostly because my favorite part of Salem is the Architecture. We first toured The Witch House, which dates back to at least 1675 and is a great example of 17th century architecture with its overhanging top story, narrow unpainted clapboards, and small diamond windows. I find this style very dark and dreary. The home belonged to Judge Jonathan Corwin, one of the judges responsible for trying the witch cases.
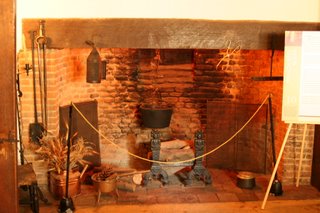
It has a typical enormous hearth from that time, where the women would have several cooking fires going at once, not unlike our using several stove top burners. With their long skirts moving amongst the fires, they were at high risk of catching themselves aflame. To prevent it, they often would dampen the bottoms of their dresses. Even so, infected burns were a common cause of death at that time. To keep the little ones out of the fire, they would tie them to themselves with strings. Thus the source of "tied to his mother's apron strings". Another reason to be glad we live when we do!
Enough of the depressing, and time for the pretty stuff! My favorite Architecture styles are Georgian and Federal. The McIntyre district of Salem, named after architect Samuel McIntyre, is one of the most beautiful neighborhoods to see these old houses, especially along Chestnut Street:
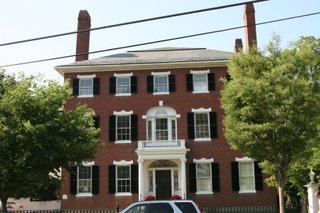 Federal Style
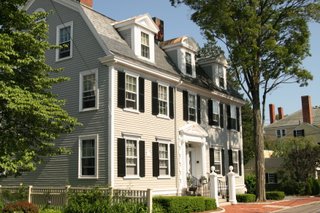 Georgian Style
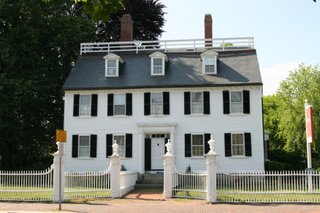 Lovely fence.
Aren't they the most beautiful houses you've ever seen?
Tuesday, July 4, 2006
Cape Cod: Antique Shops
 The Spy Glass
I love antiques. Route 6A, especially as it travels through Brewster, has many wonderful antique shops. One of them is The Spy Glass. It has many maritime related objects and is a special favorite of Grandpa Tony, who is an accomplished ship model builder. They had a fantastic tiny ship model there, "Brigate Bertha", built in 1589. That's almost 200 years before the declaration of Independance was signed! (Be sure to click on the subtitle to see the close up photos!):
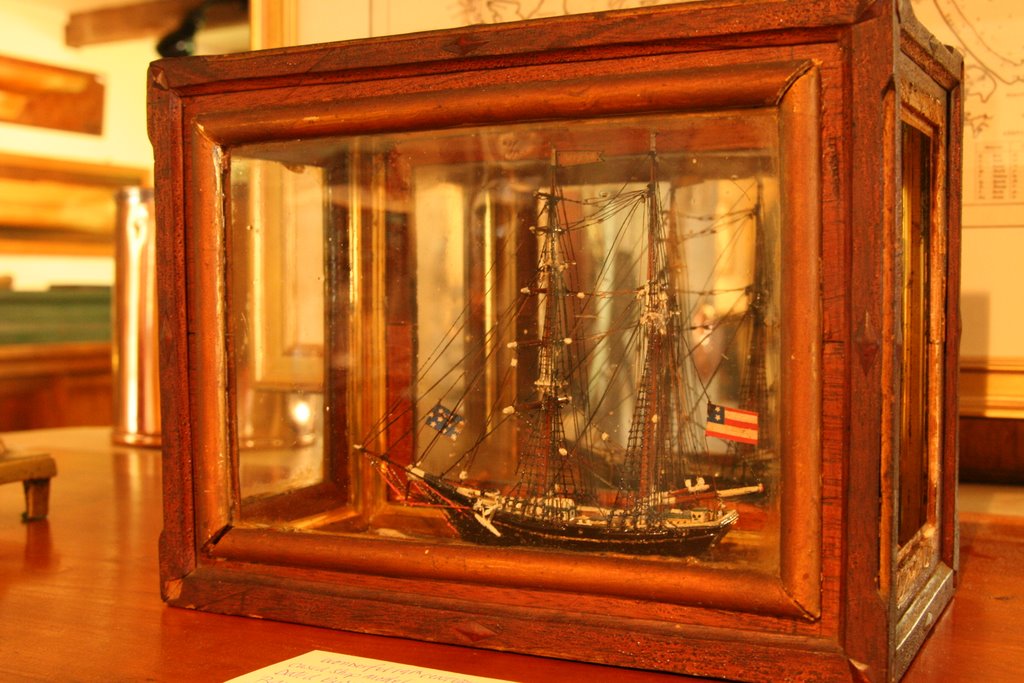 Brigate Bertha
I also really liked this English leather firefighter bucket from 1898. I loved the handpainted design of the front. People just don't make stuff like this anymore, especially beautiful everyday things.
 English leather firefighter bucket
Another Favorite Shop is a clock shop called the The Village Peddler in Dennis. I love when any of the clocks start to chime during a visit. Grandma Sally is an avid antique clock lover and has collected several, many of which have been skillfully cleaned and refurbished by this gentleman, the proprietor of the shop:

 The Village Peddler
If he isn't too busy, he will often sit in one of the rockers and talk about clocks. They are obviously a passion for him. He also often has a few other interesting items. This is, in fact, where we bought this on a previous visit:
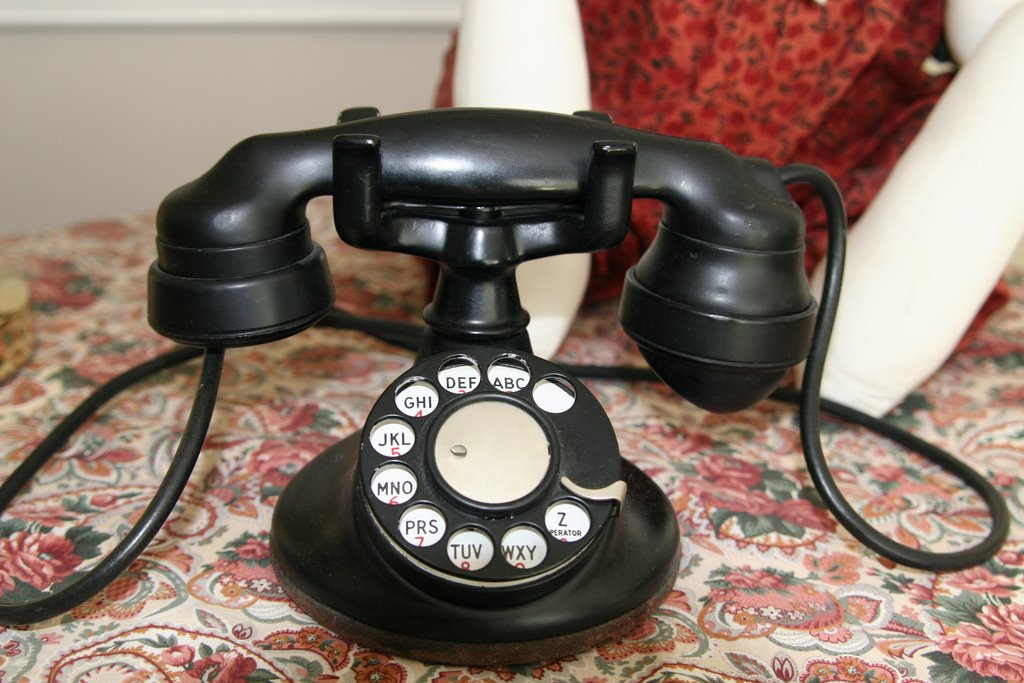 Western Electric 302 phone.
It is an antique phone from the late 1920's. It is the same kind you often see in those old black and white movies. My husband figured out how to get it working again and it now sits on the table in the family room. It makes a wonderful clicking sound as you dial, but my favorite sound is the ringer.
We didn't come home with any new finds this time, but the continuing hunt is half the fun!
Subscribe to:
Posts (Atom)