
 Nursery Clouds
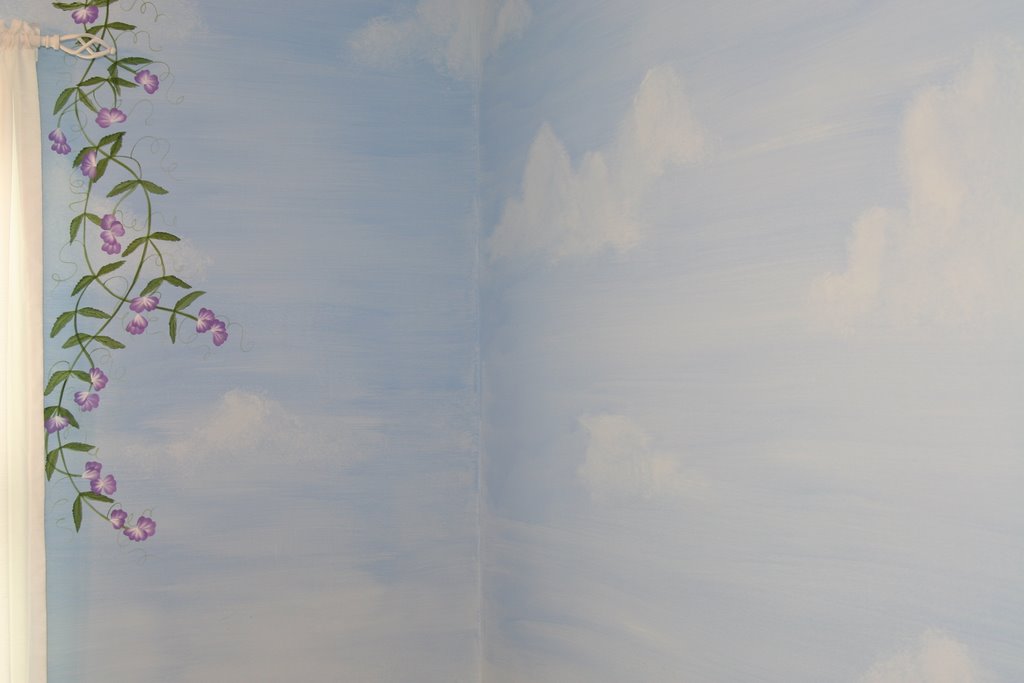
My clouds are not actually white at all. They are the background blue color of the walls. Here are the steps:
1. Paint the entire surface a background of light blue and let dry. I used Walmart's Bonnet Blue.
2. Mix Folk Art Ultramarine Blue with some of the Bonnet Blue to deepen it's tone. Then mix the result with 4 parts of glaze. Add about 10% of water.
3. Right before you glaze a wall, prep the wall surface by spraying it with a solution of half water and half glaze mixed in a spray bottle. You want it to stay moist as you work. You also only want to do one wall at a time. If it is a big wall, you might even want a helper.
4. Decide your approximate horizon line. I recommend either 1/3 or 2/3 down from the top of your mural. Also, decide where the light source is coming from.
5. Starting at the top of the wall, apply the blue glaze in horizontal strokes, across the entire surface of the wall, lightening as you get closer to your horizon line. (The sky is a lighter shade of blue near the horizon than it is high in the sky.) I applied the glaze with a brush, but I wonder if a small roller would make a more even application.
6. While the glaze is still wet, use a damp sea sponge to pull off the glaze in cloud shapes. Use a dry softening brush to soften edges with gentle horizontal strokes. You can mist with the "water and glaze only" solution if it seems to be getting dry, but go easy or you'll start to get drips.
6. Let dry. You can come back and lightly sponge with white, gray or even pink or lavender acrylic paint to add further definition and color to your clouds if you'd like. I didn't.
Tips about cloud formation:
-Things that are further away appear smaller. The size of the clouds should get smaller as you near your horizon line.
-Things that are closer are more distinct. The clouds near the top of your wall should have more distinct edges.
-Traditional clouds have billowy tops and flatter bottoms. Think of 3 dimensional clumps of puffs as you work so they don't appear flattened on the wall. Also, be sure to vary your cloud shapes.
- Pull off more paint where the light would be reflecting off the cloud's top, and less paint off the shadowy undersides.
-Check out the sky and study the clouds for a few days before you start.
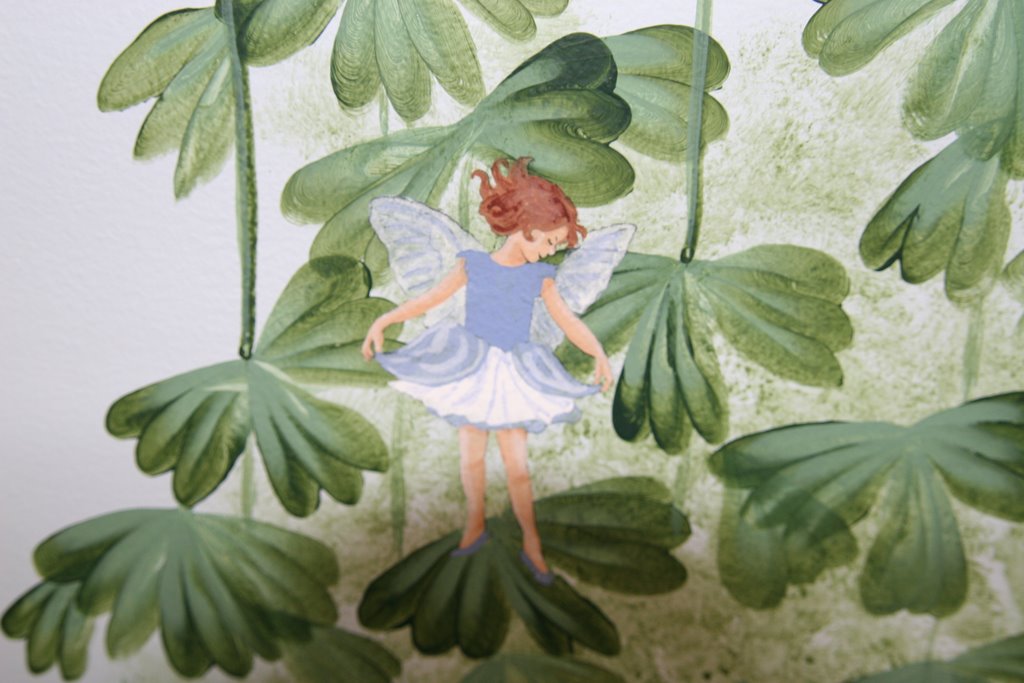 Columbine Fairy
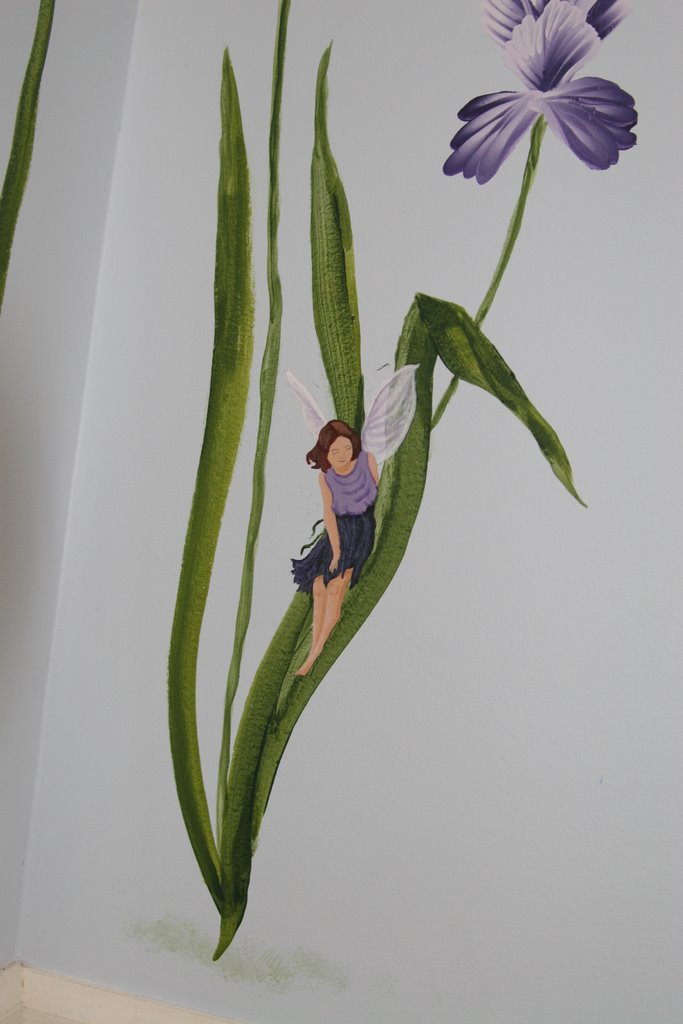 Iris Fairy
The leaves and flowers I did using Donna Dewberry's One Stroke Techniques, although I had to make up some of the flowers since I didn't have her examples of most of them. Since it was January when I did it, I studied pictures in garden catalogs instead of the actual flowers. I think I would have done some of them differently if I'd had actual examples to work from. For the fairies, I printed off images from the internet and used carbon paper to transfer their outlines to the wall. I then used acrylic paints to paint them. It took me a while since I would only paint one type of flower or one fairy each day. I just kept my paint palates in plastic bags on top of the fridge, so they wouldn't dry out. My older girls have been after me to do something in their room ever since. I finally have a plan, but I may not get to it till school restarts in the fall. It is a lot of work, but really fun!
You are so talented!
ReplyDeleteI could never ever do something like that, no matter how good the instructions are. You are an AMAZING artist! Of course now, you can never paint over these walls. They are now a family treasure.
ReplyDeleteLuckily for the internet, your photos of that room are preserved for all time! How very lucky your children are to be blessed with such a talented Mommy!
ReplyDeletePS Absolutely wonderful tutorial...
What a fabulous job! Love it. Snce I have been so focused on the nurery, my daughter has wanted new fun stuff in her room, too. Funny how one project turns into however man children you have. Lol. Because as I move Drew out of the nursery to make room for Sasha, I have his and Drew's room to reorganize and coordinate as well!
ReplyDeletetypo - his and JONAH'S room
ReplyDeleteThat room is so gorgeous. I am in awe of your talent.
ReplyDeleteThanks for the instructions! Very detailed. You really are talented, I hope our room turns out as cute as yours!
ReplyDeleteBeautiful!!!! Totally impressed.
ReplyDeleteWow! You are so talented! I'm impressed!
ReplyDeleteOH MY GOODNESS!! those are gorgeous! ya - i am so not an artist. I did get an artist friend of mine to paint a mural on my son's wall though.
ReplyDeleteI didn't comment on it before, but these are the BEST clouds I have ever seen! You did a beautiful job. It looks like a perfect spring day!
ReplyDeleteThat is simply beautiful. I tried doing a faux finish once. Never again - too stressful! You make it look easy (the mark of a great artist!). Your baby is precious!
ReplyDeleteHow absolutely beautiful! Thank you for the inspiration.
ReplyDelete